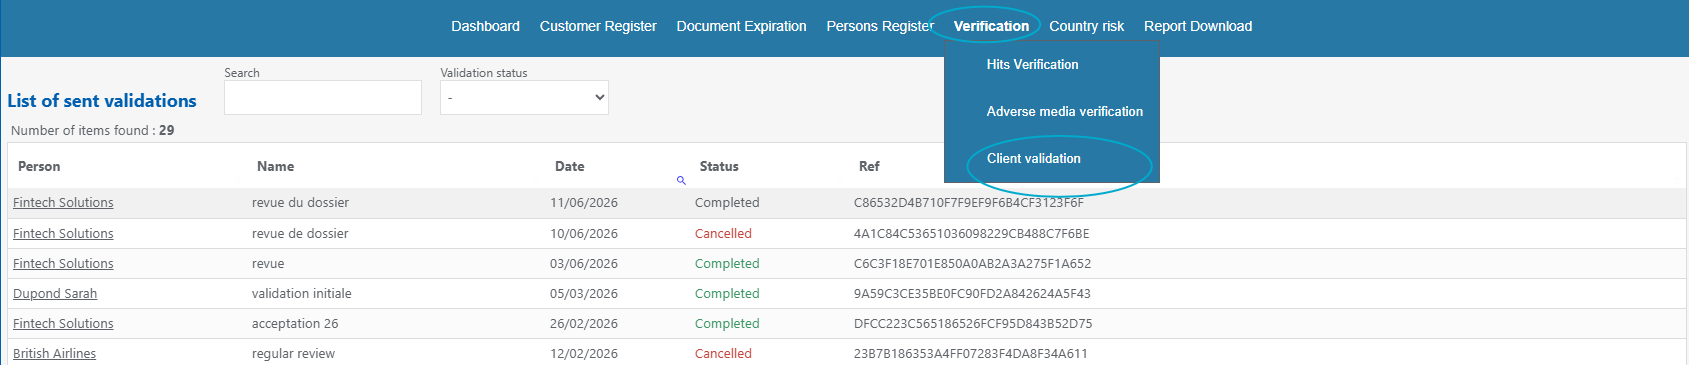
This procedure describes the request for KYC file validation, the intervention of validators and the tracking of history.
Create a validation request #
1. In the client folder, open the «Record Validation» tab.
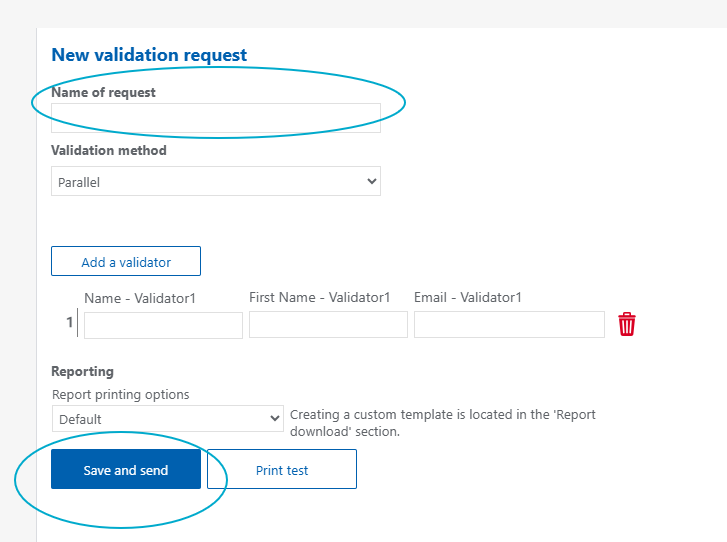
2. Click «Request Validation».
3. Name the request (examples: Customer acceptance, hit processing validation, file review...)
4. Add the person or people who need to approve the file.
5. Choose the validation method: Series (validator 1, then 2, and so on) or parallel (everyone at the same time).
6. Choose the type of report to be validated
7. Click «Save and send».
Notes:
If you want to preview the report that will be sent, click on «print test ».
If you wish to customise the email that is sent, you can directly edit it in the pop-up window that appears before sending.
If a validation is in progress, you cannot send a second validation for the same file. You will need to cancel the current validation first.
Validator action #
The validator receives an email request. A first email contains the access link; a second email contains the security code.
- Consult the PDF document that summarises the information encoded in the application.
- State your name and surname.
- Sign
- Add a comment, mandatory in case of rejection.
- Validate or reject the KYC file.
Follow validation history #
Within a KYC file #
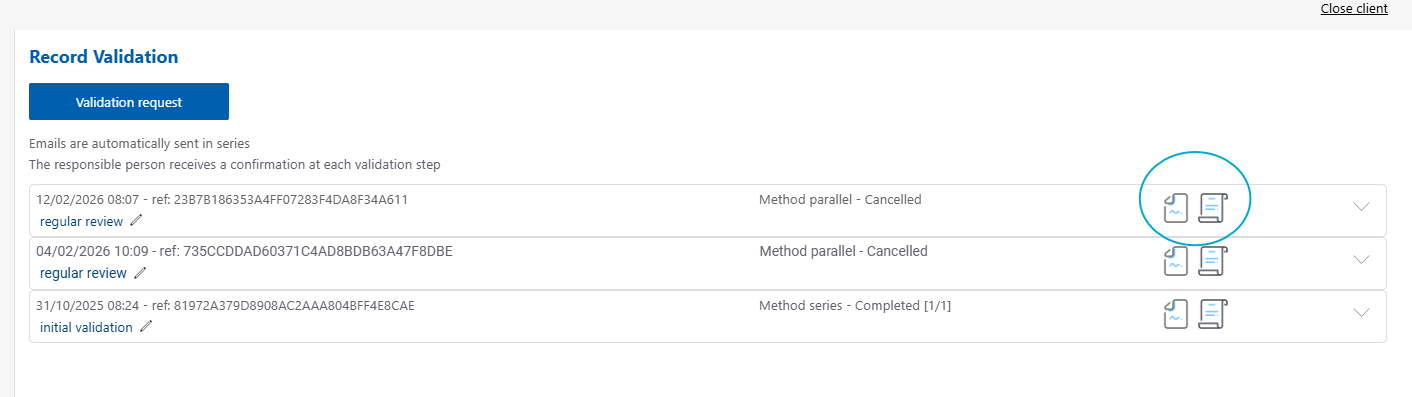
In the «Record Validation» tab, the user can view the history of requests and their status.
- In treatment: the validator has not yet approved or rejected the file.
- Rejected: The validator rejected the file and provided a comment.
- Cancelled: validation request has been cancelled.
- Completed: the validator has approved the KYC file.
The history also allows you to download the validated report and proof of validation in PDF format.
These reports remain available in the app indefinitely.
Globally #
To track your clients' validations, you can either:
Download an Excel file containing all the necessary information regarding validation.
This Excel file is available within the «Client Register» tab, by clicking «Export customer list» in the top right corner.»

2. Consult the validation register
This register is available in the top banner by clicking on «Verification» then «Client validation».»